Setting up Authentication with Firebase
For convenience, Ensemble's Sign In can connect directly to Firebase, allowing you to manage users via Firebase console without the need for a backend server.
Prerequisites
- You have created a Firebase project
- You have created an app on Ensemble Studio
- You have Flutter (opens in a new tab) installed on your machine
- You have a Simulator for testing
1. Configure Firebase project
Login to your Firebase account and navigate to your project in order to complete following steps.
Enable Sign in with Google
Go to the Authentication section of your Firebase project, and enable Authentication. After that, enable Google as the sign-in method.
Enable Sign in with Phone
If you want to enable phone authentication, you will need to enable Phone as the sign-in method. You can also add phone numbers to the list of test numbers for your project.
Add iOS app
Under project settings, add iOS app to your Firebase project. As you go through the steps, you will download a file named GoogleService-Info.plist . We will use details from this file later on.
Add Android app
Under project settings, add Android app to your Firebase project. As you go through the steps, you will download a file named google-services.json . We will use details from this file later on.
2. Configure Ensemble app
Get starter app
Clone Ensemble Starter (opens in a new tab) from GitHub. Using a code or text editor, open /ensemble/ensemble-config.yaml .
Set your definition source to be Ensemble:
    definitions:
	  # where your page definitions are hosted ('local', 'remote' or 'ensemble')
	  from: ensemble

	  ensemble:
	  appId: <add your Ensemble app id here>
You can find you Ensemble app id by navigating to the app on Ensemble Studio, clicking the menu icon, and selecting Copy App ID option.
Add Firebase app details to Ensemble app
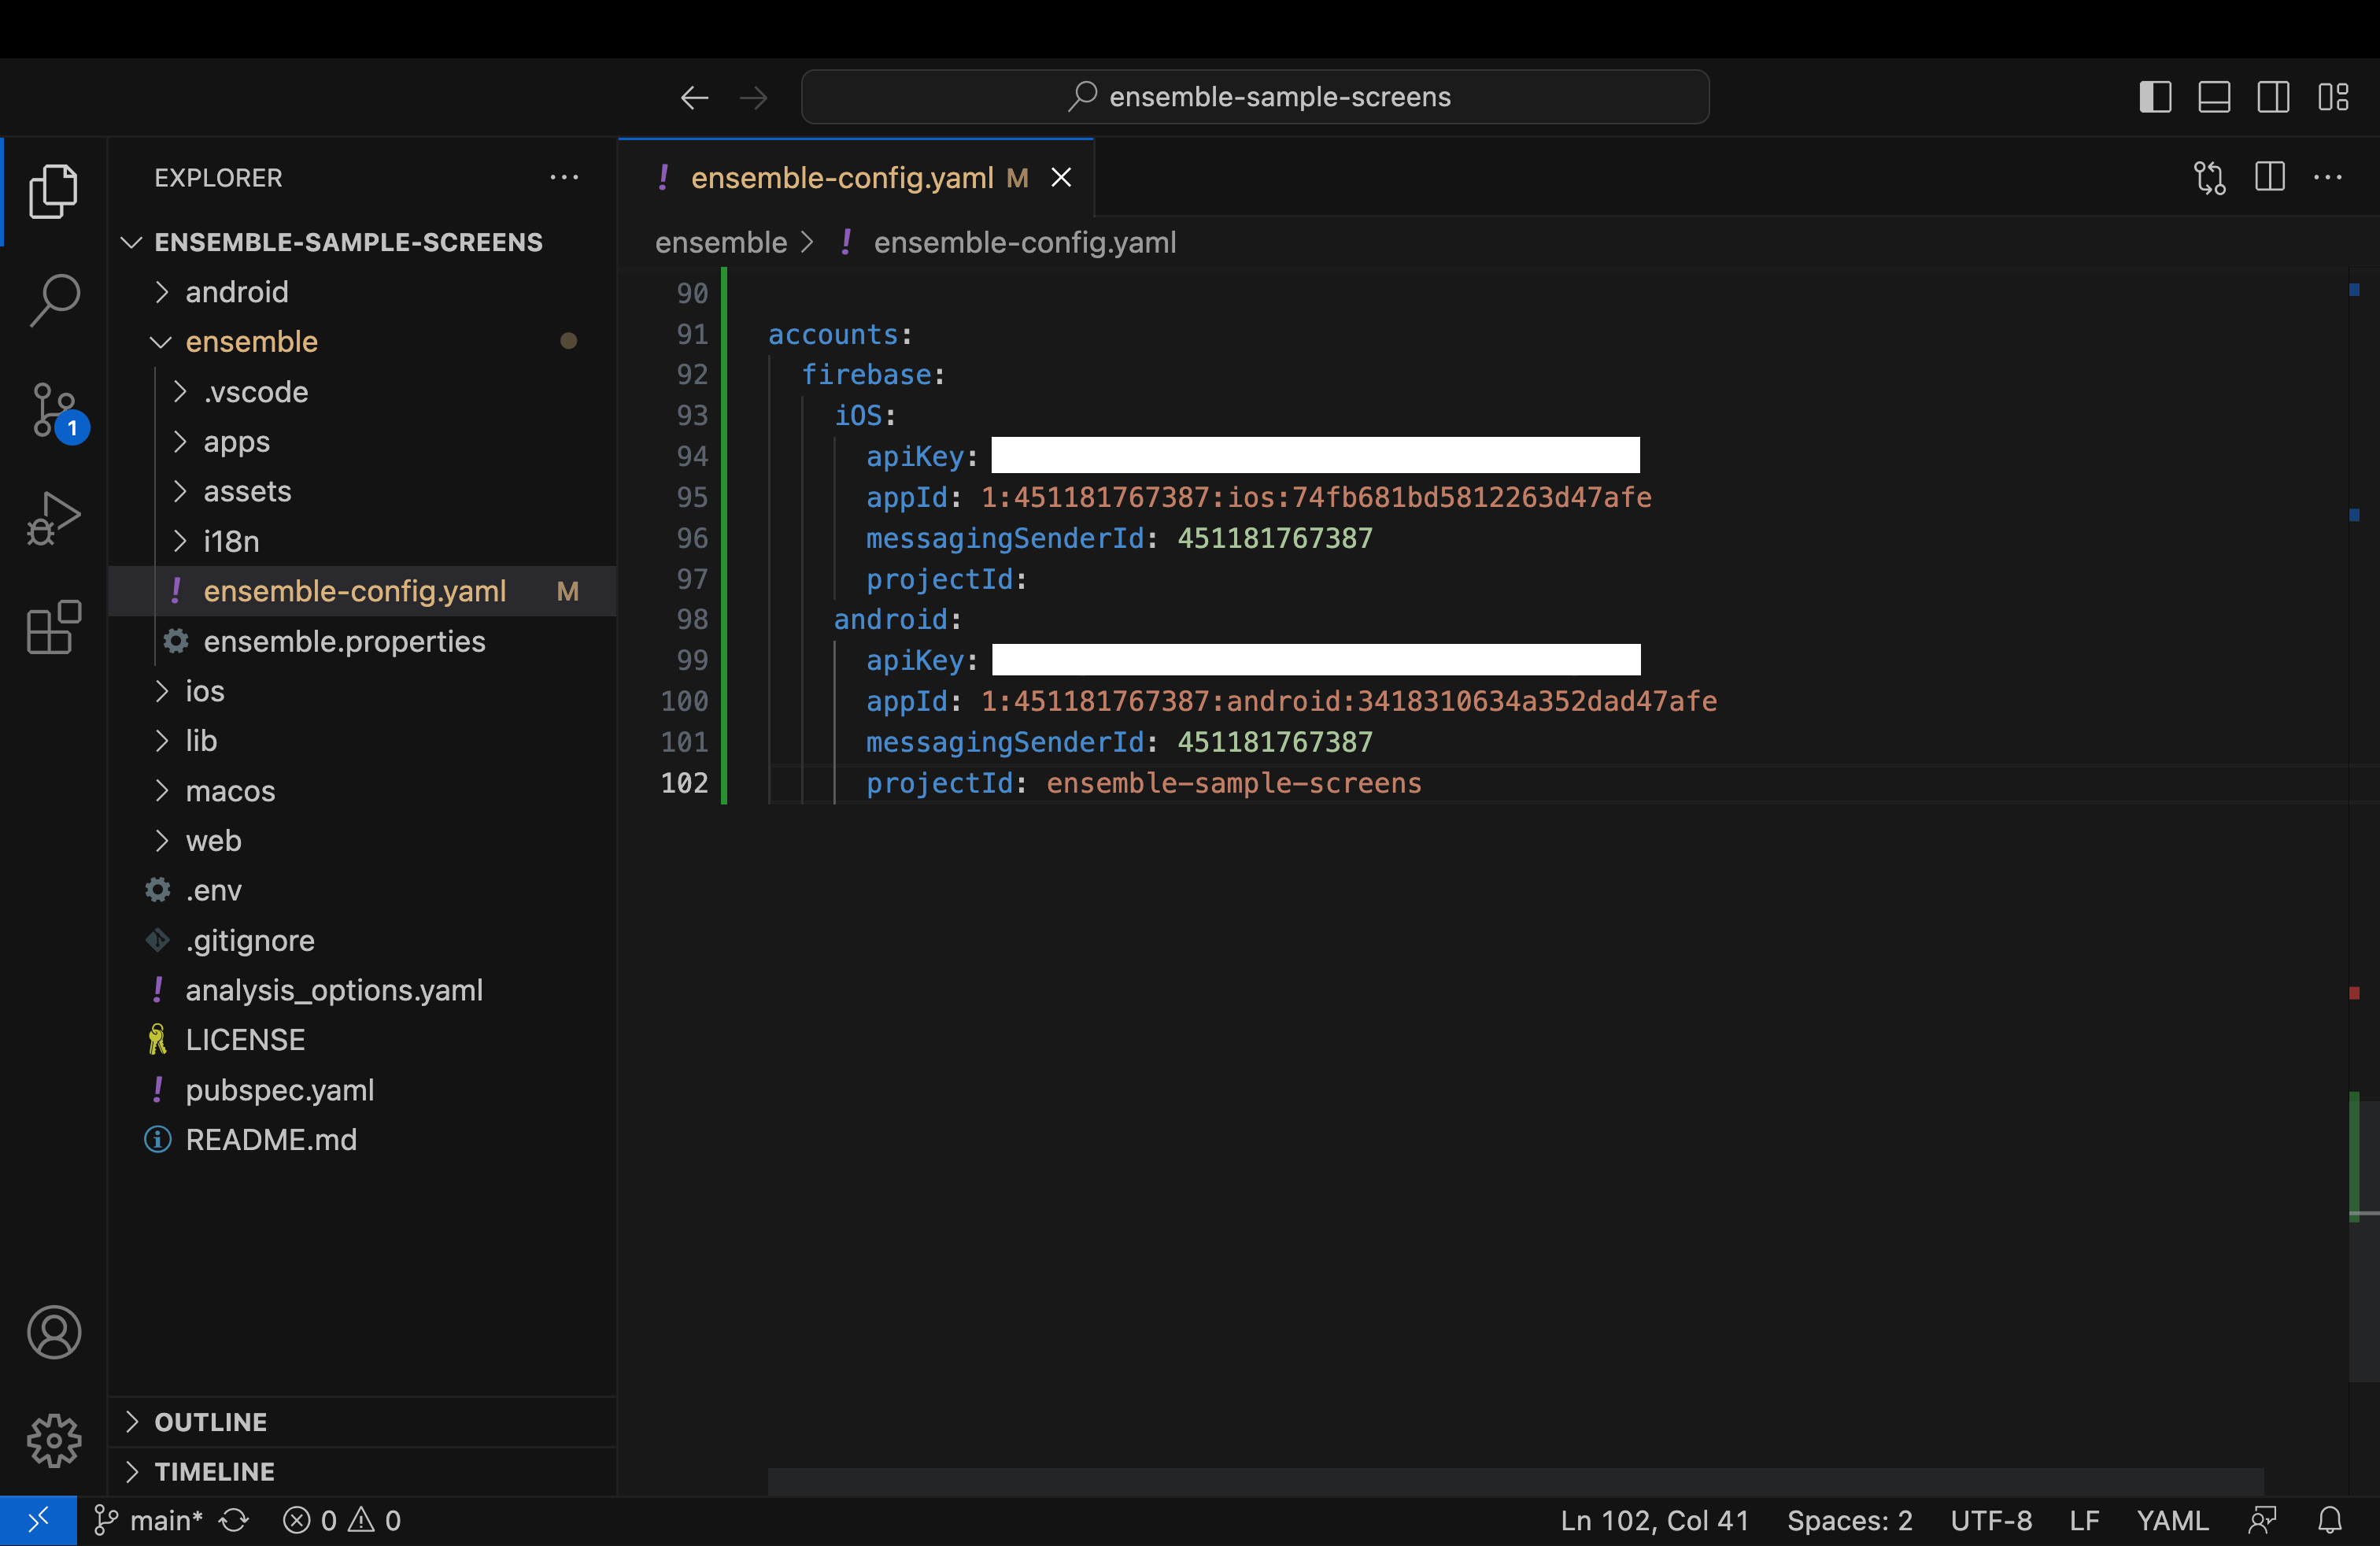
In the same file, ensemble-config.yaml , add Firebase account details in the following format.
    accounts:
		firebase:
			iOS:
				apiKey: # In GoogleService-Info.plist, take the value of API_KEY
				appId: # In GoogleService-Info.plist, take the value of GOOGLE_APP_ID
				messagingSenderId: # In GoogleService-Info.plist, take the value of GCM_SENDER_ID
				projectId: # In GoogleService-Info.plist, take the value of PROJECT_ID
			android:
				apiKey: # In google-services.json, take value of client.api_key.current_key
				appId: # In google-services.json, take value of client.client_info.mobilesdk_app_id
				messagingSenderId: # In google-services.json, take value of project_info.project_number
				projectId: # In google-services.json, take value of project_info.project_id
To get these details, use the GoogleService-Info.plist and google-services.json you downloaded during step 1.
Here's an example of the outcome.
Add sign-in providers to Ensemble app
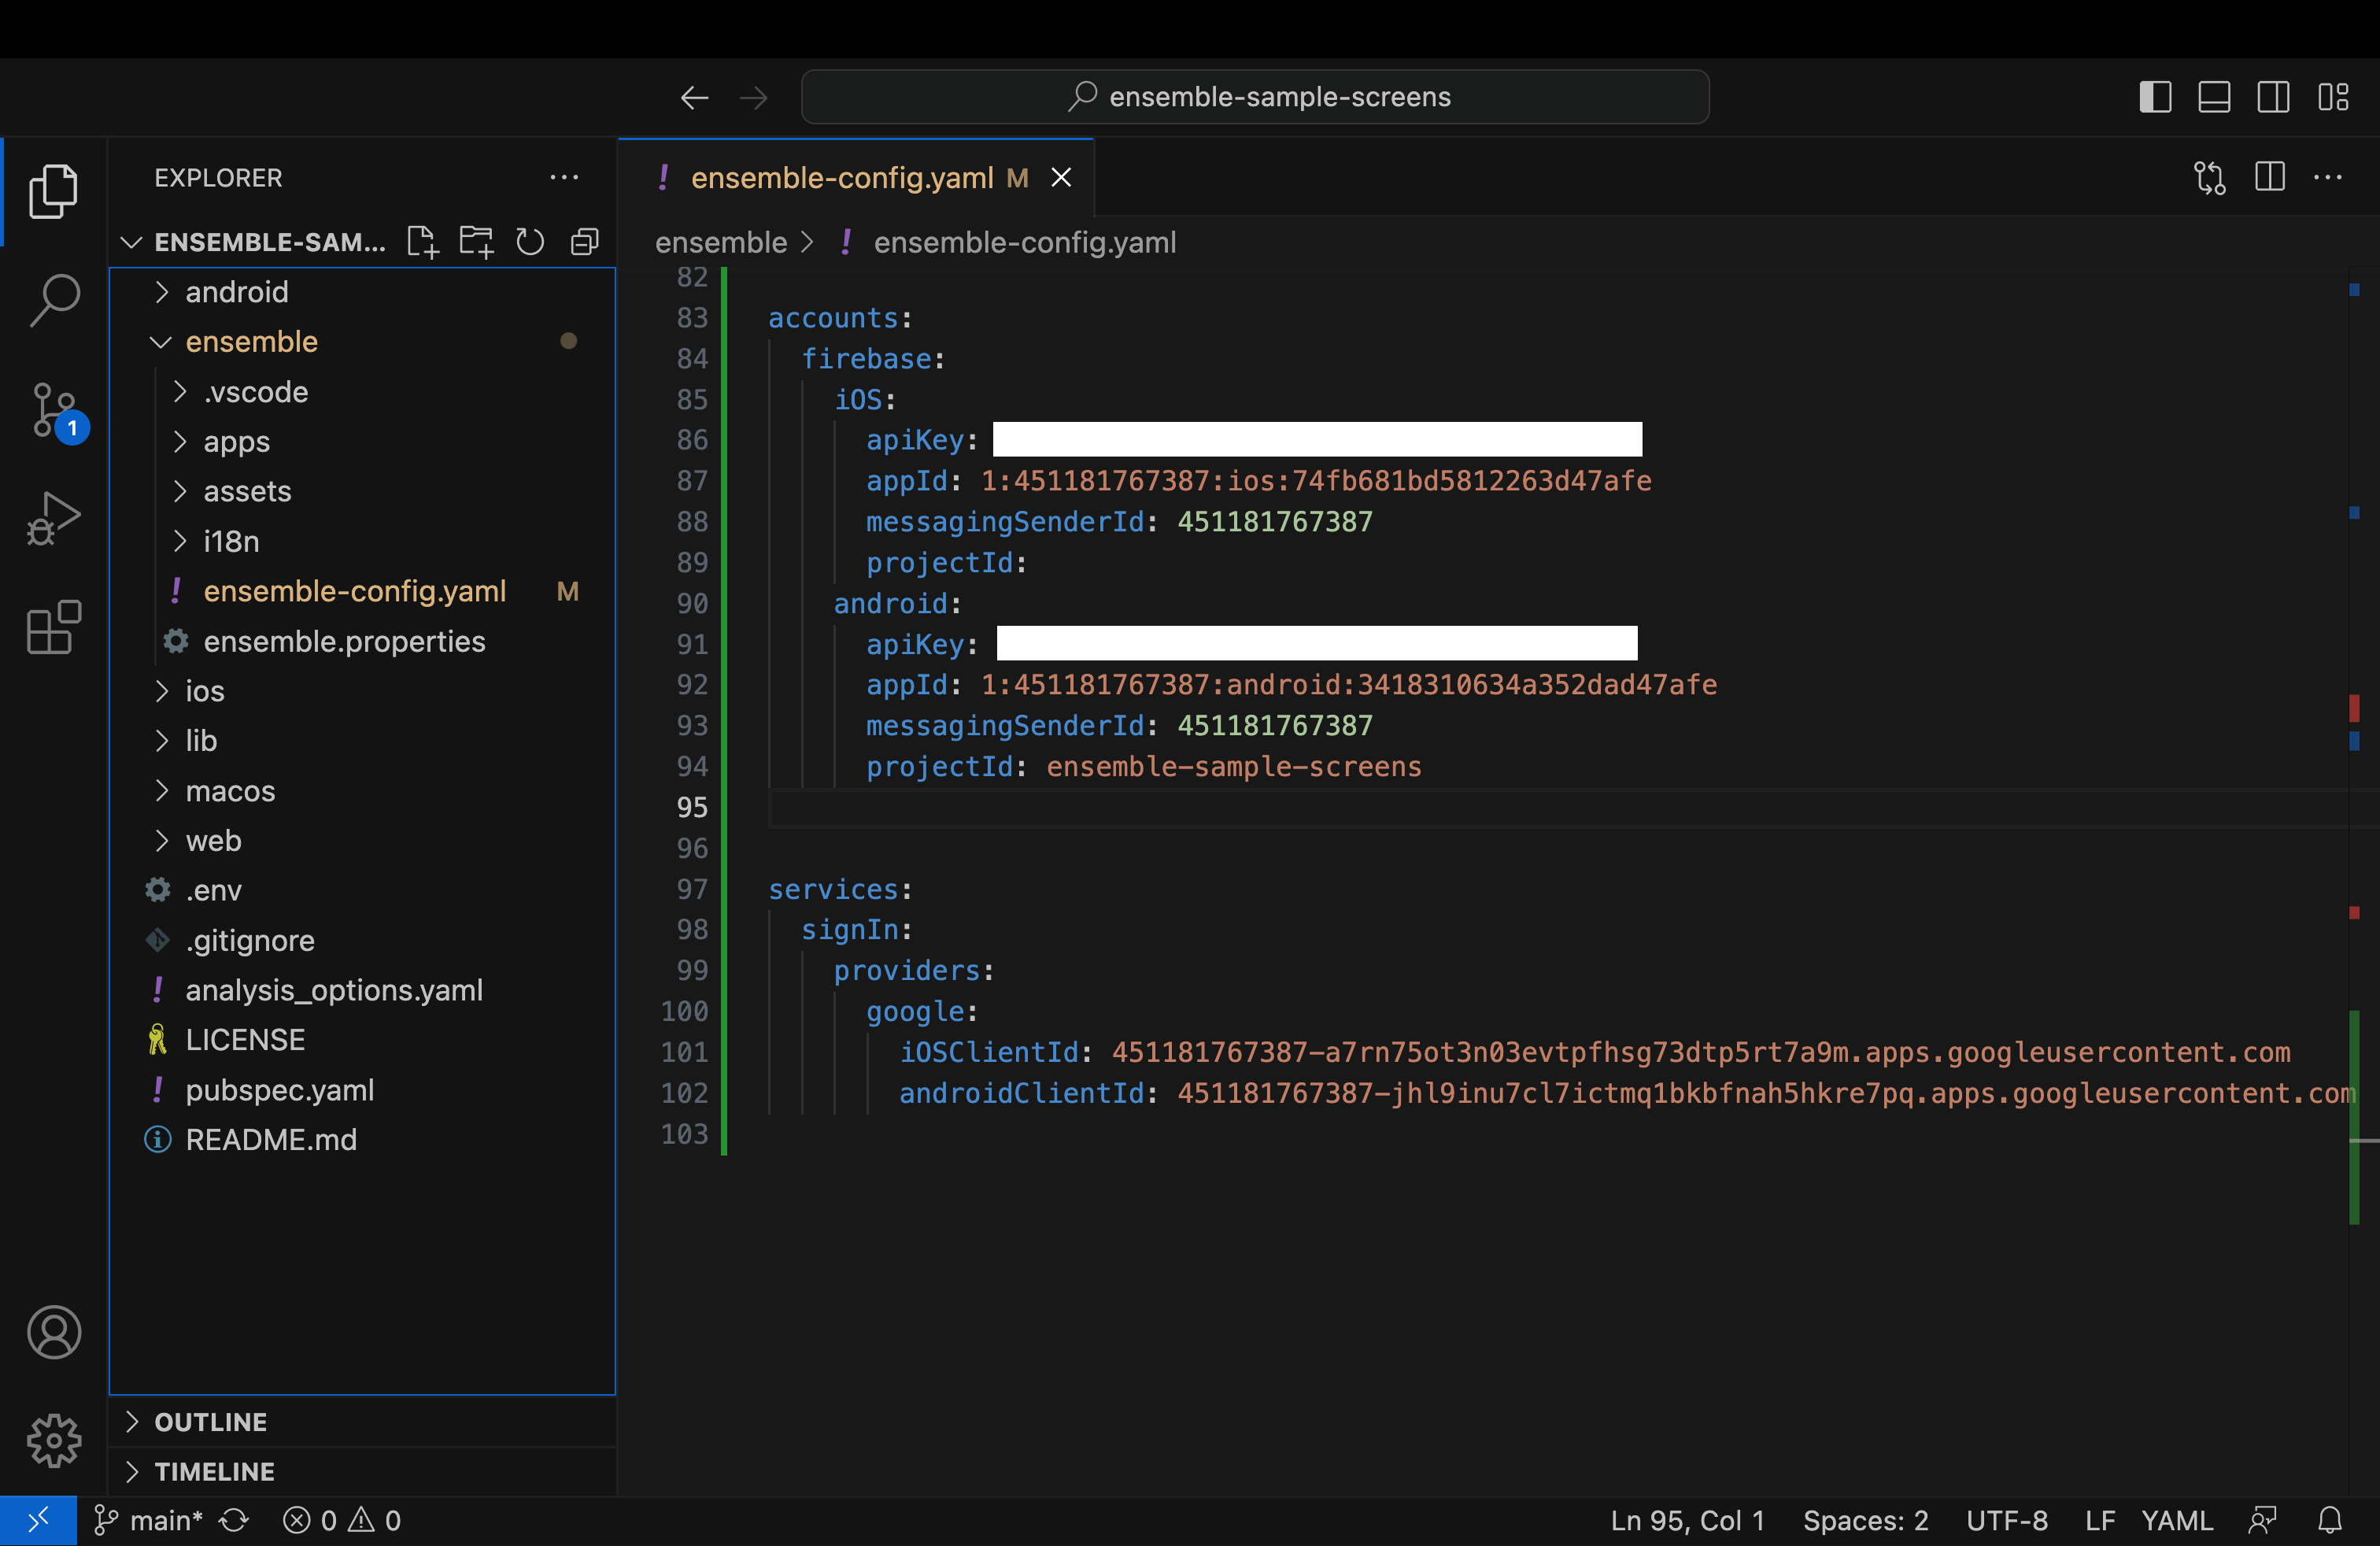
In the same file, ensemble-config.yaml , under services add the following.
    services:
      signIn:
        providers:
          google:
            iOSClientId: # In GoogleService-Info.plist, take the value of CLIENT_ID
            androidClientId: # In google-services.json, take value of client.oauth_client.client_id
Here's an example of the outcome.
3. [iOS only] Update Info.plist file
Inside the directory where you cloned Ensemble Starter, open /ios/Runner/Info.plist with a code editor. Add the following to this file.
    <array>
        <!-- Google Sign in, replace with your URL scheme -->
        <dict>
            <key>CFBundleTypeRole</key>
            <string>Editor</string>
            <key>CFBundleURLSchemes</key>
            <array>
                <!-- Reversed Client Id, required for when using Google Sign In -->
                <string> URL SCHEME GOES HERE </string>
                <!-- iOS App Id, required when using firebase phone auth -->
                <!-- e.g app-1-702752068720-ios-4634f0f9d0e0748a7b10b5 -->
                <!-- You can get this from firebase console -->
                <string> Firebase iOS APP ID GOES HERE </sting>
            </array>
        </dict>
    </array>
Use the GoogleService-Info.plist that you downloaded during step 1, and copy the value of REVERESED_CLIENT_ID. Paste this value in inside this string tag: <string> URL SCHEME GOES HERE </string>.
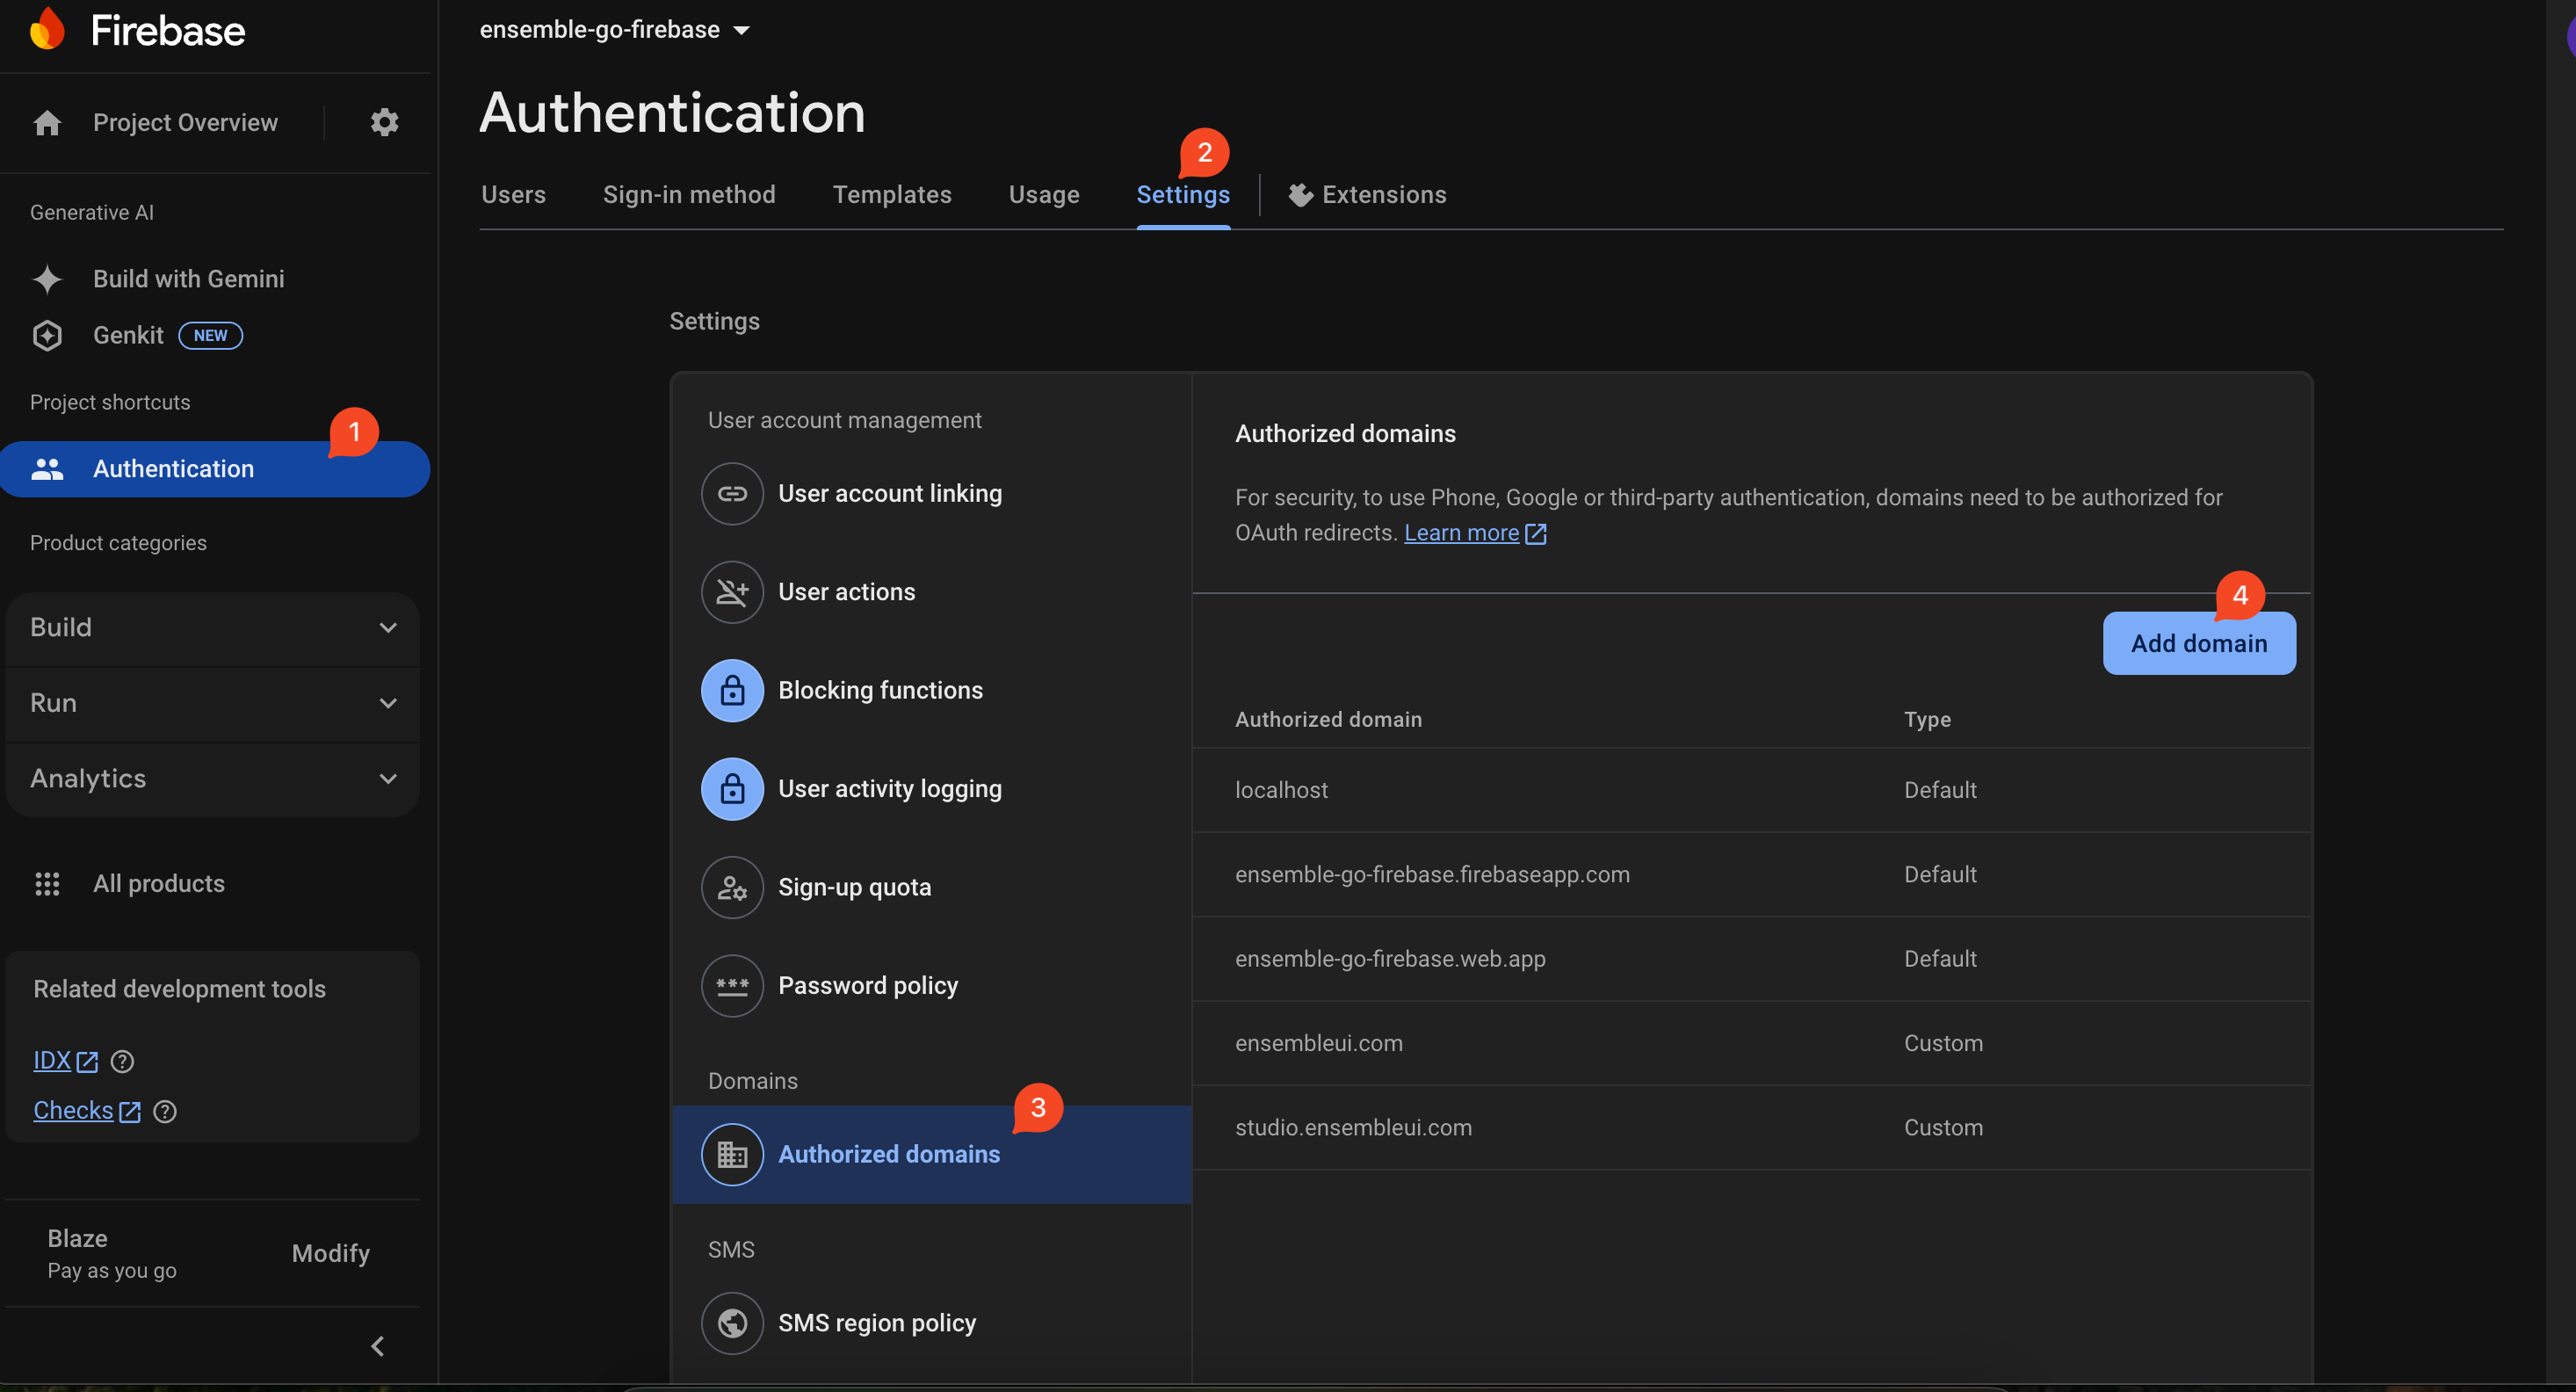
4. [Web Only] Add Authorized domains
Add authorized domains to your Firebase project. This is required for web apps to work with Firebase.
Go to Firebase console, navigate to your project, and under Authentication, go to Settings. Add your domain to the list of authorized domains.
5. Enable Auth service in Ensemble code
By default, Ensemble does not include the authentication module to avoid installing unnecessary packages. Here, we uncomment a few lines of code to get the necessary packages.
Inside the directory where you cloned Ensemble Starter, open /lib/generated/ensemble_modules.dart.
- Search for this line and uncomment it:
// import 'package:ensemble_auth/auth_module.dart';- Search for this line and uncomment it:
// AuthModuleImpl().init();- Search for this line and set it to true
static const useAuth = false;6. Add a Sign in screen
Now that your app is set up to use Firebase, add a new screen in the studio with following definition.
Firebase Social Sign In
For Social Sign In, Ensemble currently provides SignInWithGoogle and SignInWithApple. Set the provider property to firebase.
View:
  body:
    Column:
      styles:
        mainAxis: center
        crossAxis: center
        padding: 40
      children:
        - SignInWithGoogle:
            provider: firebase
Depending on your need, assign actions to onSignedIn and onError properties as well. For demo purpusoes here, we will just show a toast message.
        - SignInWithGoogle:
            provider: firebase
            onSignedIn:
              showToast:
                message: ${auth.user.email}
            onError:
              showToast:
                message: Something went wrong
Firebase Phone Auth
If you need firebase phone auth, you can use these actions
sendVerificationCode - to send the verification code to the phone number
sendVerificationCode:
  provider: firebase
  method: phone
  phoneNumber: "+1-----------" (required if type is phone)
  onSuccess:
      // to go to the next screen for otp, it should provide the verification id and resend token
      // e.g event.data.verificationId, event.data.resendToken
    onError:
      // handle error state
validateVerificationCode - to validate the code sent to the phone number
validateVerificationCode:
   provider: firebase
   method: phone
   code:  // otp from the `ConfirmationInput` widget
   verificationId: // verification id from  `sendVerificationCode` action
   onSuccess:
      // return the authenticated user and idToken
      // e.g event.data.user.id, event.data.idToken
   onError:
      // handle the error state
   onVerificationFailure:
      // handle the verification failure
resendVerificationCode - to resend the code if resend token is available
resendVerificationCode:
   provider: firebase
   method: phone
   phoneNumber: ${phoneNumber} (required if type is phone)
   resendToken: ${resendToken}
   onSuccess:
      // return the verificationId and resendToken
  onError:
     // handle error state
Note: If resend token is not available, you can use sendVerificationCode to get the updated token.
Kitchen Sink - Firebase Phone Auth (opens in a new tab)
Firebase Sign In with Custom jwt Token
Authenticate users in Firebase using a custom jwtToken minted by the backend with Firebase Admin SDK, enabling access to secure Cloud Functions.
signInWithCustomToken - to pass token to firebase console
signInWithCustomToken:
   token: // Token id from  `signInWithServerAPI` action
   onAuthenticated:
      // return the authenticated user and idToken
      // e.g event.data.user.id, event.data.idToken
      // if user doesn't exists (uuid doesn't match any existing user)
      // it'll create anonymous one
      // otherwise return authenticated user
   onError:
      // handle the error state
      // Errors can be invalidToken, NullToken etc
7. Build and run the app
- Review
/ensemble/ensemble.properties. Update the appId as needed - this is your app's bundle ID in the format of . e.g.com.ensembleui.myfirstapp(all lowercase, no special characters). - Run
flutter pub upgrade. Run this occasionally when the Ensemble framework has been updated. - Run
flutter create --org com.ensembleui --project-name starter --platform=ios,android .(note the period at the end). If you modified the appId, make sure the org and project name match the bundle ID. - Run the App with
flutter run. If you currently have a running iOS or Android emulator, the command will prompt for a selection, otherwise the App will be opened in the web browser.